vdefg

vdefg
ed

fsetrse

fsetrse
grestgre

brdt

brdt
htr

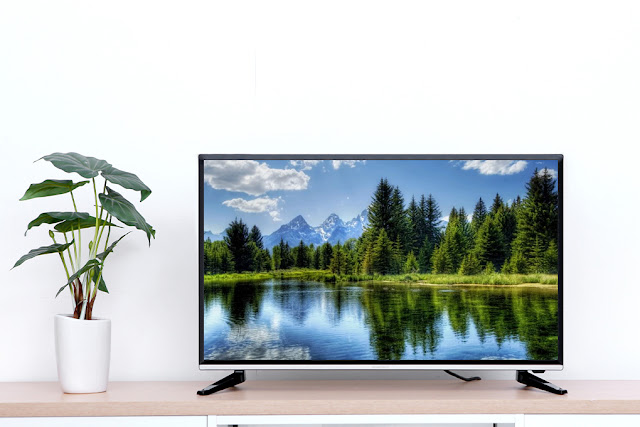
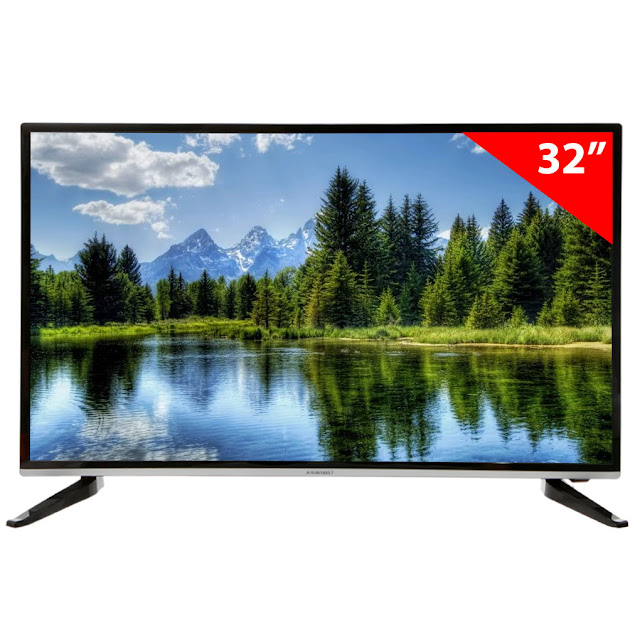
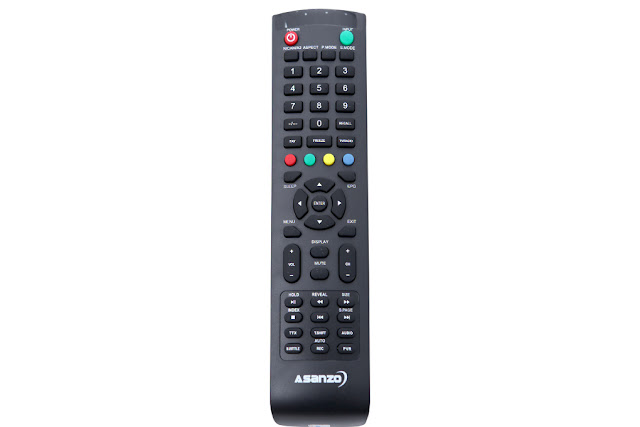
Tivi Led ASANZO Model ES 32T800 32 inch (2017)

Tivi Led  ASANZO ES 32T800 32 inch Model 2017Tivi Led  ASANZO ES 32T800 32 inch Model 2017


Tivi Led  ASANZO ES 32T800 32 inch Model 2017

Tivi Led  ASANZO ES 32T800 32 inch Model 2017


[giaban]3,499,000 ₫[/giaban][giacu]3,950,000 ₫[/giacu][tinhtrang]Còn hàng - Sản phẩm mới về[/tinhtrang]
 [tomtat]
  • Bảo hành: 24 tháng
  • Địa chỉ: 35A Nguyễn Hoàng Tôn, Hà Nội
  • Vận chuyển: Miễn phí nội thành
  • Liên hệ: 0974.812.482 (Mr Nhất) - 0936.250.991 (Mr Hoàn)
  • GỌI ĐỂ CÓ GIÁ TỐT NHÂT
[/tomtat][chitiet]

Tên sản phẩm: Tivi Led Asanzo 32 inches  ES32T800
Bảo hành: 24 tháng

Mô tả tóm tắt
Tivi 32 inch, màn hình LED, HD Ready, tích hợp DVB-T2, AV, VGA, HDMI, USB.

Thông tin sản phẩm:
- Màn hình: 32 inches
- Độ phân giải  HD
- Độ tương phản động: 5.000.000:1
- Tần số quét TruMotion 100Hz
- Chương trình kiểm soát hình ảnh Picture Wizard II
- Cảm ứng màu thông minh
- Hệ thống loa ẩn (5W + 5W)
- Chế độ âm thanh Infinite
- Kết nối USB 2.0 (HD DivX, MP3, MP4, FLV, MKV, Jpeg play)
- Chế độ siêu tiết kiệm điện
- Tích hợp truyền hình kỹ thuật số mặt đất.
- Cấu hình:
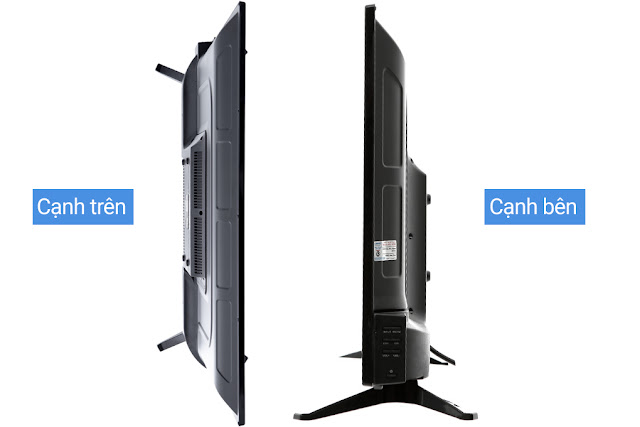
+ 2 cổng AV
+ 1 cổng USB
+ 1 cổng VGA
+ 3 cổng HDMI
+ 1 cổng Headphone

Clip Mở hộp TV ASANZO 32 inchchính hãng


  •  Màn hình LED 32” độ phân giải cao cung cấp độ sáng cao, hình ảnh sống động
  •  Tính năng kết nối USB cho phép người dùng xem phim, nghe nhạc qua thẻ nhớ USB
  •  Kết nối HDMI chất lượng cao
  •  Thiết kế viền mỏng lịch lãm và sang trọng
  •  Màn hình hỗ trợ toàn bộ các định dạng file phổ biến: HD DivX, MP3, MP4, FLV, MKV, Jpeg play

Giới thiệu sản phẩm Tivi LED Asanzo 32 inch HD – Model ES32T800

TV LED Asanzo ES32T800 là mảnh ghép không thể thiếu để tạo nên vẻ đẹp hoàn thiện cho không gian giải trí tại gia của gia đình bạn. Màn hình LED rộng 32” với độ phân giải HD đem đến góc nhìn rộng cùng khả năng tái tạo hình ảnh chuẩn xác và sắc nét đến không ngờ. Bên cạnh đó Asanzo ES32T800 còn được trang bị tính năng tiết kiệm điện cho hiệu quả kinh tế cao mà vẫn đảm bảo đem đến cho bạn những trải nghiệm tuyệt vời và khó quên.

TÍNH NĂNG NỔI BẬT
Sang trọng và lịch lãm
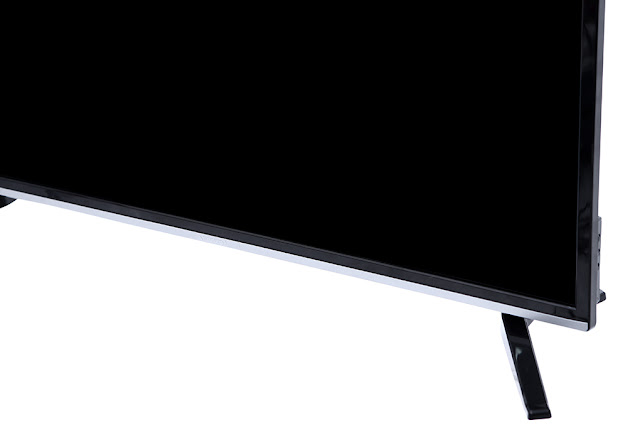
Sở hữu màn hình siêu mỏng thời thượng cùng lớp vỏ ngoài siêu bền, TV LED Asanzo ES32T800 không chỉ mang lại nét đẹp lịch lãm và tinh tế cho không gian giải trí mà còn tạo cảm giác khung hình rộng hơn. Thêm vào đó là chân đế cứng cáp giúp sản phẩm đứng vững chắc trên nhiều mặt phẳng. Đây sẽ là lựa chọn tuyệt vời cho không gian giải trí nhà bạn.

Chất lượng hình ảnh tuyệt đỉnh
Màn hình TV LED Asanzo ES32T800 có kích thước 32”, độ phân giải HD đem đến cho người dùng những trải nghiệm hình ảnh với chất lượng tuyệt mỹ. Kết hợp với công nghệ Picture Wizard II, từng khung hình sẽ được tái hiện thật sống động với độ sáng và màu sắc phù hợp với không gian nhà bạn, đem đến những trải nghiệm hình ảnh phù hợp và đẹp mắt nhất.

Tần số quét 100Hz
Trang bị tần số quét TruMotion 100Hz, TV ES32T800 đảm bảo khả năng chuyển cảnh mượt mà, chân thật. Nhờ đó, những hình ảnh chuyển động trong những bộ phim bom tấn hay những game đình đám sẽ trở nên rõ nét và sống động như những gì bạn mong đợi.

Âm thanh thật như cuộc sống
Asanzo ES32T800 cho khả năng tái tạo âm thanh tương tự với âm thanh vòm nhờ được trang bị chế độ Infinite. Tiếng động sẽ được phát ra từ nhiều hướng, đưa cả gia đình bạn vào thế giới giải trí chân thực như đang thưởng thức trực tiếp. Không những vậy, hệ thống loa công suất 5W x 2 đem đến dải âm chuẩn hơn, từng bản nhạc, bộ phim sẽ được trình diễn thật mạnh mẽ và hoành tráng.

Siêu tiết kiệm điện
TV LED ES32T800 giúp tiết kiệm năng lượng tối đa nhờ được tích hợp nhiều tính năng vượt trội như điều khiển ánh sáng nền, chức năng tắt màn hình (giúp bạn có thể tắt màn hình mà vẫn giữ lại âm thanh và nhạc), chế độ Standby. Đặc biệt là tính năng cảm biến thông minh giúp TV có thể tự động điều chỉnh ánh sáng, màu sắc tùy theo điều kiện ánh sáng của môi trường xung quanh. Bên cạnh đó, công nghệ đèn nền LED còn giúp tiết kiệm điện hơn 30% so với những dòng TV LCD thông thường.

Tích hợp đầu thu DVB-T2
Bạn không cần phải trang bị thêm bộ giải mã (set-top box) vì đã có sẵn đầu thu DVB-T2 tích hợp bên trong TV LED ES32T800. Chỉ cần một chiếc anten ngoài trời là bạn và gia đình đã có thể thưởng thức những kênh truyền hình kỹ thuật số với độ nét cực cao.
Tivi Led  ASANZO ES 32T800 32 inch Model 2017

Tivi Led  ASANZO ES 32T800 32 inch Model 2017


Tivi Led  ASANZO ES 32T800 32 inch Model 2017

Tivi Led  ASANZO ES 32T800 32 inch Model 2017

Tivi Led  ASANZO ES 32T800 32 inch Model 2017

Tivi Led  ASANZO ES 32T800 32 inch Model 2017

Tivi Led  ASANZO ES 32T800 32 inch Model 2017

Tivi Led  ASANZO ES 32T800 32 inch Model 2017

Tivi Led  ASANZO ES 32T800 32 inch Model 2017


[/chitiet][hot] Model Mới [/hot]
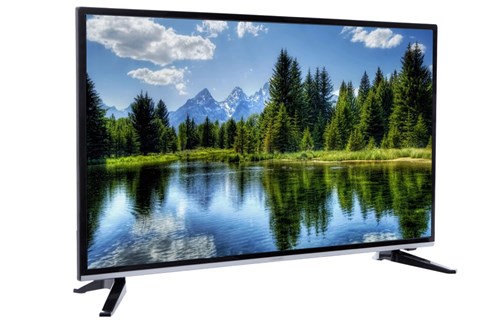
Funai Bluray Player – Funai B4-M500 - B4-M501 - B4-M502 – How to initialize the player - Firmware update – Network update

HOW TO INITIALIZE THE BLU-RAY DISC PLAYER
To put the program back at the factory-default, initialize the BD player as the following procedure.
Note:
# By initializing, network is reset to disconnected state and “Network Service Disclaimer” appears on the screen.
# Once the unit is initialized, the unit starts from Initialization the next time it is turned on. The  Initialization allows quick set up of language and network settings. To exit this mode, select “Cancel” on the screen.
1. Turn the power on.
2. Remove the disc on the tray and close the tray.
3. Press [SKIP UP], [1], [2], and [3] buttons on the remote control unit in this order
4. Press [ STOP ] button on the remote control unit.
5. After initializing, the power will turn off automatically.
FIRMWARE RENEWAL MODE
1. Turn the power on and remove the disc on the tray and close the tray.
2. Press [SKIP UP], [6], [5], and [4] buttons on the remote control unit in this order.
3. Select “Disc” or “USB” or “SD Card” and press [OK] button on the remote control unit.
4. Insert the disc or USB Memory Stick or SD Card for version up.
5. The BD player enters the F/W version up mode automatically. Make sure to insert the proper F/W for the state of this model.
6. After the update, the power will turn off automatically.
7. The power turns back on automatically. Remove the disc or USB Memory Stick or SD Card from the unit.
Note: All the settings will be put back to factory default.
The following USB Memory Stick/SD Card can be used for software update. Make sure to use a device that has enough space.
# USB Memory Stick (FAT16/FAT32 file system)
# SD/Mini SD/Micro SD Card (FAT12/FAT16 file system)
# SDHC/Mini SDHC/Micro SDHC Card (FAT32 file system)
How to Verify the Firmware Version
1. Turn the power on.
2. Remove the disc on the tray and close the tray.
3. Press [SKIP UP], [1], [2], and [3] buttons on the remote control unit in this order.
4. To exit this mode, press [ STOP ] button.
Network Update
1. Press [HOME] button to display Setup menu.
2. Select Settings - Others - Software Update - Network.
3. When “Yes” is chosen, the [Network connecting ] screen appears and the unit starts connecting to the network.
4. The firmware version confirmation screen  will appear on the screen. Select “Yes” and press [OK] button.
5. Firmware downloading starts.
6. Upon completion of downloading,  “D
ownload has been completedwill appear on the screen. Press [OK] button.
7. The unit starts reading the firmware.
8. Updating starts automatically.
9. The power turns off automatically.
10. The power turns back on automatically.
How to Eject Disc
When a disc cannot be removed due to malfunction or when an unplayable disc is inserted, follow the procedure below to remove the disc.
Procedure A
1. Unplug the AC adapter and then plug it in.
2. Turn the power on by pressing the [ EJECT ] button and the disc will be ejected automatically.
Procedure B
1. Remove the Front Assembly.
2. While pressing the portion A down, slide the portion B in the direction of the arrow as shown below to eject the disc.


BenQ digital camera - BenQ DC GH650 – Calibration procedure – Firmware update – Troubleshooting

Calibration Procedure
Auto calibration (OB, AGC/WB, Meshu 26, Meshut 80) & Infinite Focus Calibration
1. Insert battery and press “Playback + Tele +Set/OK ” key to enter test mode.
2. The LCD will display “OB CLBT”. Place camera in front of light source box and make sure the camera is close to light source box or can shoot at black objects.
3. Press “OK” key to run auto test. When LCD shows “OK” , it has passed the test. If it shows “NG”, it has failed.
4. Press the “Playback” key to return to main menu and select AGC/WB.
5. The LCD will display “AGC/WB”. Place the camera in front of the light source box and set it to LV10.
6. Press “OK” key to run auto test.
7. When LCD displays “OK” , it has passed the test. If shows “NG”, it has not passed.
8. When LCD displays “Meshut 26”, place camera in front of light source box and set it to LV12.
9. Press “OK” key to start auto test.
10. When LCD displays “OK”, it has passed the test, if it displays “NG”, if has failed the test.
11. When LCD displays “Meshut 80”, place camera in front of light source box and set it to LV14.
12. Press “OK” key to start auto test.
13. When LCD displays “OK”, it has passed the test, if it displays “NG”, it has failed the test.
14. When the LCD displays “Focus”, it requires Collimator for calibration. Place the camera in front of collimator.
15. Press “OK” key to start auto test.
16. When LCD displays “OK”, it has passed the test, if it displays “NG”, it has failed the test.
Flash WB calibration
1. Place camera on the fixture.
2. Press “Playback + Set (OK) + Tele” key to enter engineering mode.
3. When LCD will display “Flash WB”. Shoot subject in low brightness environment.
4. When LCD display “OK”, it has passed the test, if it displays “NG”, it has failed the test.
USB mode setting
1. Press “Playback + Set (OK) + Tele” key.
2. When LCD displays “X USB MODE”. Press “OK” key to start auto test.
3. When LCD display “PC to MS mode”, it has passed the test.
4. Press “Power” key to turn off camera.
Firmware update using SD card
1. Make sure battery power is full.
2. Format SD card and copy F/W to USB
3. Inert SD card into camera.
4. Press “Power+Right (flash)” key for 5 seconds.
5. Press left key to select “Yes”, press “OK” key to begin.
6. When FW update completes, it will shut down automatically.
Trouble Shooting 
A. Cannot Power On:
1. Exterior check.
01. Check any deformation / dirt / poor soldering of the battery spring.
02. Check the welds of battery’s spring of M/B.
2. Check the connection of each PCB.
01. Check the connection between M/B and ST Board.
02. Check the connection between M/B and LCD
03. Check the connection between M/B and LENS
3. Power on current is 0mA.
01. Check U13 voltage output, if it is abnormal, please analyze its circuit.
02. Check the fuse F1 & F2, if it is 0.
03. Check the S1 of strobe board.
B. Display abnormal
1. LCD display abnormal
01. Check the connection J6 for M/B and LCD-FPC.
02. Check the function for LCD and U1 of MB.
03. Check the U13 output is normal or not.
2. Button abnormal
01. Check the peripheral components of M/B U1
3. Image abnormal
01. To make sure the U13 output is A7_D3V3, A7_D2V5, A7_D1V1 and if are ok. If there is abnormal signal occurs,
please check and replace.
02. Check the peripheral components of U1 of MB.
03. Check the peripheral components and CCD board.
4. TV display abnormal
01. Check J3 of M/B
02. Check the connection between U1 of MB and other components.
5. Power LED is on, but LENS cannot work.
01. Check the connection between J4 of M/B and LENS FPC.
02. Check the LENS is OK or not.
03. Make sure the output voltage of U13 is VCC5.5V LENS voltage
04. Check the peripheral components of U5 on the main board.
C. Flash abnormal
1. No charge
01. Check the welds between ST/B and M/B.
02. Check the welds of U1, T1 and peripheral components.
2. Nonstop charge.
01. Check the function and welds of U1.
02. Check the welds between ST/B and M/B.
3. Flash light cannot work
01. Check the welds between ST/B and M/B.
02. Check U1, TR1, IC1 and flash light.
D. Other Defects:
1. No sound when press the buttons.
01. Make sure the setting is correct. (Enable), speaker and BGA whether if ok
02. Make sure the function of speaker and MB U1 with good soldering.
03. Make sure the peripheral components of MB U1 are in good condition.
2. Recording without sound.
01. Check the MIC function.
02. Check the MB U1 with good soldering.
3. Card slot cannot read / write SD card.
01. Check SD card function.
02. Check SD card slot whether if in good soldering.
03. Check the current for SD card welds.

Tech Troubleshooting – LED LCD TCON and panel Troubleshooting


Model: LCD, LED
Symptom: There are vertical lines in the top right part of the screen.
Solution: The LVDS cable can cause this symptom if it is not seated correctly. Check the position of the LVDS cable and the contacts. If it is seated correctly and you still see vertical lines, replace the LVDS cable.
Model: LCD, LED
Symptom: There are two RED vertical bars and RED smears around objects.
Solution: The LVDS cable can cause this if it is not seated correctly. Check the position of the LVDS cable and the contacts. If it is seated correctly and you still see red bars and smears, replace the LVDS cable.
Model: LCD,LED
Symptom: There are horizontal black and white bars across the screen in RF ONLY
Solution: As you can see, the OSD is not affected. That tells you that the panel is OK. Replace the main board.
Model: UN55C8000XFXZA
Symptom: The right side of the screen is darker than the left.
Solution: Bring up the Test Picture. If the symptom affects the Test Picture, replace the panel.
Model: LCD, LED
Symptom: There are vertical lines in the picture.
Solution: The LVDS cable can cause this symptom if it is not seated correctly. Check the position of the LVDS cable and the contacts. If it is seated correctly and you still see vertical lines, replace the LVDS cable.
Model: PN42C430A1DXZA
Symptom: The picture has blemishes.
Solution: If the symptom affects the Test Picture, replace the panel.
Model: LNT5271
Symptom: The right side of the screen has horizontal lines.
Solution: In the example above, the line distortion is affecting the menu. Bring up the OSD menu. If the symptom affects the menu, replace the T-Con board.
Model: UN46D6500VFXZA
Symptom: Ghosting image (Double Image)
Solution: Replace the T-Con and LVDS.
Model: LN55C650
Symptom: Colored Vertical lines
Solution: Bring up the “Picture Test”. If the lines appear in the Picture Test, the cause is a bad panel. If the lines do not appear, disconnect all signal sources and check again. If the lines are still in the Picture Test, change the main board. If the lines are gone, then a signal 
source is causing the problem.

Apple iPhone 7 – How to replace the battery

 Remove the two 3.4 mm pentalobe screws on the bottom edge of the iPhone.
Warm up the lower edge of the phone to soften the adhesive holding the display inplace. Allowing the adhesive to warm up before proceeding.
Attach a suction cup to the lower half of the display assembly, just above the home button.
Be sure the suction cup does not overlap with the home button.
Pull up the suction cup to create a small gap between the display assembly and the rear case.
Insert the flat end of a spudger into the gap.
The watertight adhesive holding the display in place is very strong, and creating this initial gap takes a significant amount of force. 
Slide the spudger to the left along the lower edge of the iPhone.
Twist the spudger to widen the gap between the display and rear case.
Slide the spudger up the left side of the iPhone, starting at the lower edge and moving towards the volume control buttons and silent switch.
Do not try to pry the top edge of the display away from the rear case, as it is held in place by plastic clips that may break.
Remove the spudger from the left side of the iPhone and insert the flat edge into the bottom right corner of the device.
Twist the spudger to widen the gap between the display assembly and the rear case.
Slide the flat end of the spudger up the right side of the phone to break up the adhesive holding the display in place.
Pull up on the suction cup to lift up the display and open the iPhone.
Do not raise the display more than 10 Degree as there are ribbon cables along the right edge of the device connecting the display to the logic board.
Pull up on the small nub on the suction cup to remove it from thefront panel.
Slide an opening pick along the top edge of the iPhone, between the rear case and front panel, to break up the remaining adhesive holding the screen in place.
Pull the display assembly slightly away from the top edge of the phone to disengage the clips holding it to the rear case.
Open the iPhone by swinging the display up from the left side, like the back cover of a book.
Don't try to fully separate the display yet, as several fragile ribbon cables still connect it to the iPhone's logic board.
At this point you may lay the phone down on a flat surface like an open book.
Remove the following tri-point Y000 screws from the lower connector bracket:
Three 1.2 mm screws (RED)
One 2.4 mm screw (ORANGE)
Remove the lower connector bracket.
Use the point of a spudger to lift the battery connector out of its socket on the logic board. Bend the connector cable up slightly to prevent it from making contact with the socket and providing power to the phone.
Use the flat end of a spudger or a fingernail to disconnect the two lower display connectors by prying them straight up from their sockets on the logic board.
To re-attach press connectors, press down on one end until it clicks into place, then repeat on the other end. Do not press down on the middle. If the connector is even slightly misaligned, the connector can bend, causing permanent damage.
Remove the two 1.3 mm Phillips screws securing the bracket over the front panel sensor assembly connector.
Remove the bracket.
Disconnect the front panel sensor assembly connector from its socket on the logic board.
This press connector should also be reconnected one end at a time to minimize the risk of bending.
Remove the display assembly.
Remove the two 1.9 mm Phillips screws securing the barometric ventto the rear case.
Remove the vent.
Use the flat end of a spudger to disconnect the Taptic Engine connector from its socket on the logic board.
Remove the three 1.6 mm Phillips screws securing the Taptic Engineto the rear case.
Remove the Taptic Engine.
Use a pair of tweezers to peel back one of the adhesive strips on the lower edge of the battery.
Use a pair of tweezers to peel back the other adhesive strip on the lower edge of the battery.
Try to keep the strips flat and unwrinkled during this procedure; wrinkled strips will stick together and break instead of pulling out cleanly.
Slowly pull one battery adhesive tab away from the battery, toward the bottom of the iPhone.
Pull steadily, maintaining constant tension on the strip until it slips out from between the battery and the rear case. For best results, pull the strip at a 60 Degree angle or less.
The strip will stretch to many times its original length. Continue pulling and re-grab the strip near the battery if necessary.
Hold down the battery as you remove the second strip, or the strip may fling the battery when it separates from the case.
Otherwise, if either of the adhesive strips broke off underneath the battery and could not be retrieved.
Warm up the rear case, After about a minute, flip the phone over and use a plastic card to break up any remaining adhesive behind the battery.
Do not insert the card from the right, as prying against the logic board can damage it. Also, be sure to not bend the battery.
Don't pry under the topmost section of the battery, near the volume up button and mute switch, or you may damage the volume controls ribbon cable, which is adhered to the rear case just beneath the battery.

HP LASERJET PRO M351 - M451 – Calibration procedure – NVRAM Initialization – Error code and causes

Calibration Procedure
Calibration is a product function that optimizes print quality. If you experience any print-quality problems, calibrate the product.
1. Open HP ToolboxFX (
HP Device Toolbox).
2. Click the System tab, and then click the Print Quality link.
3. In the area for Color Calibration, select the Calibrate Now check box.
4. Click Apply to calibrate the product immediately.
ERROR CODES
ERROR 10.0000 
Description
The memory chip for one of the print cartridges cannot be read or is missing.
# 10.0000 = black memory chip error
# 10.0001 = cyan memory chip error
# 10.0002 = magenta memory chip error
# 10.0003 = yellow memory chip error
# 10.1000 = black memory chip is missing
# 10.1001 = cyan memory chip is missing
# 10.1002 = magenta memory chip is missing
# 10.1003 = yellow memory chip is missing
Recommended action
Reinstall the print cartridge.
Turn the product off and then on.
If the problem is not solved, replace the print cartridge.
ERROR 49 
Description
The product experienced an internal error.
Recommended action
Turn the product off, wait at least 30 seconds, and then turn the product on and wait for it to initialize.
If you are using a surge protector, remove it. Plug the product directly into the wall socket. Turn the product power on.
ERROR 50.00 
Description
The product has experienced an error with the fuser.
Recommended action
Turn the product power off, wait at least 30 seconds, and then turn the product power on and wait for it to initialize.
Turn off the product, wait at least 25 minutes, and then turn on the product.
If you are using a surge protector, remove it. Plug the product directly into the wall socket. Turn the product power on.
ERROR 51.00 
Description
The product has experienced an internal hardware error.
Recommended action
Turn the product power off, wait at least 30 seconds, and then turn the product power on and wait for it to initialize.
If you are using a surge protector, remove it. Plug the product directly into the wall socket. Turn the product on.
ERROR 55.0 
Description
The product has experienced an internal error.
Recommended action
Turn the product power off, wait at least 30 seconds, and then turn the product power on and wait for it to initialize.
If you are using a surge protector, remove it. Plug the product directly into the wall socket. Turn the product power on.
ERROR 57 
Description
The product has experienced a problem with its internal fan.
Recommended action
Turn the product power off, wait at least 30 seconds, and then turn the product power on and wait for it to initialize.
If you are using a surge protector, remove it. Plug the product directly into the wall socket. Turn the product power on.
ERROR 59.0 
Description
The product has experienced a problem with one of the motors.
Recommended action
Turn the product power off, wait at least 30 seconds, and then turn the product power on and wait for it to initialize.
If you are using a surge protector, remove it. Plug the product directly into the wall socket. Turn the product power on.
ERROR  79 
Description
The product has experienced an internal firmware error.
Recommended action
Turn the product power off, wait at least 30 seconds, and then turn the product power on and wait for it to initialize.
If you are using a surge protector, remove it. Plug the product directly into the wall socket. Turn the product power on.
ERROR 79 - Service Error 
Description
An incompatible DIMM is installed.
Recommended action
1. Turn the product power off.
2. Install a DIMM that the product supports.
3. Turn the product on.
NVRAM initialization procedure
1. Turn the product off.
2. Simultaneously press the Right arrow button and the Cancel button. Keep these buttons depressed as you turn the product on.
3. When Permanent storage init. appears on the display, release both buttons.
4. When the product has finished the NVRAM initialization, it returns to the Ready state.

Philips FWP3200D – Disassembling procedure – Smps circuit diagram – Audio system repair and service

DISASSEMBLY PROCEDURE
Dismantling of Main Unit
(1) Put the system upwards.
(2) Loosen 8 screws “A” open Top cover.
(3) Disconnect the wires in the canbinet.
Dismantling of Back Panel.
(1) Loosen 12 screw “G”.
(2) Disconnect the wires to draw out the Back Panel.
Dismantling of Main Board
(1) Keep flat the Top cover.
(2) Loosen 6 screw ”C”, to detach Main Board.
Dismantling of AMP+Power Board & Jack Board
(1) Loosen 4 screw “I”,to detach Jack Board.
(2) Loosen 6 screw“H”,to detach Remote Board
Dismantling of MIC Board &VFD Board
(1) Loosen 4 screw “D”detach MIC Board & loosen 5 screw”E” detach KEY Board.
(2) Loosen 2 screw“F” detach KEY Board.